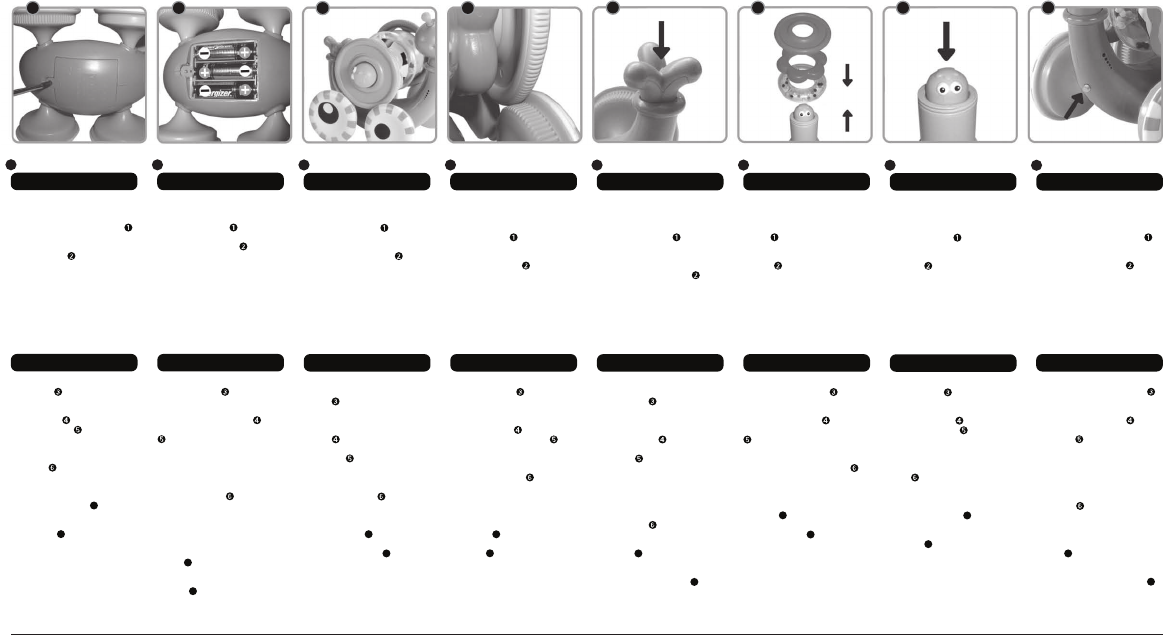
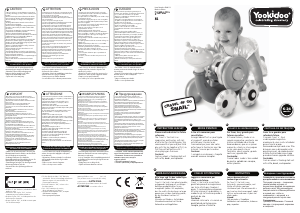
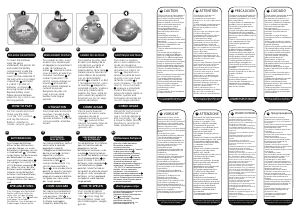
Для того чтобы добавить
батарейки, отвинтите крышку
аккумуляторного отсека (в
нижней части гусеницы)
крестообразной отверткой
и добавьте 3 батарейки AA
1.5v (LR6), как показано,
соблюдая полярность .
Возвратите на место крышку.
Пожалуйста, выньте
батарейки, если Вы не
пользуетесь игрушкой
длительное время.
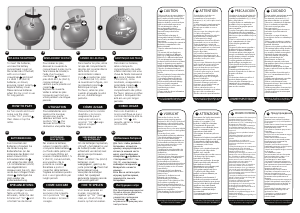
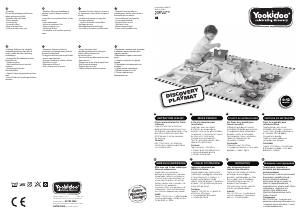
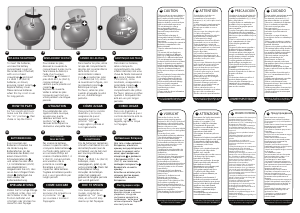
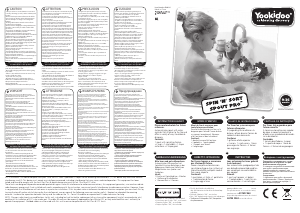
Перед началом игры положите
панцирь на спину гусеницы ,
удостоверившись, что пазы на
ободе панциря соответствуют
пазам колес гусеницы .
Нажмите на кнопку на хвосте
гусеницы и смотрите, как она
ползет, а ее панцирь
вращается под
очаровательную мелодию.
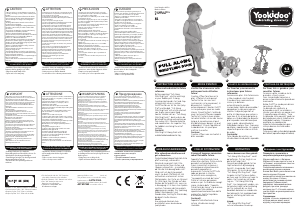
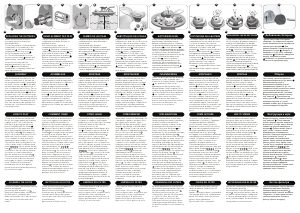
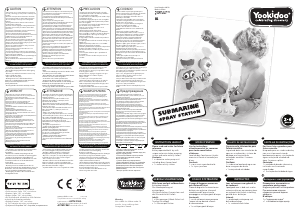
Панцирь имеет форму
кармана, и его можно снять и
использовать для того, чтобы
отдельно поиграть с
погремушкой, шариками и
пищалкой, а затем вернуть на
место. Для работы пищалки
просто нажмите на оранжевую
кнопку .
Для того, чтобы гусеница
прекратила движение, нажмите
на зеленую кнопку спереди .
Добавление батареек
Инструкции к игре
Om de batterijen te plaatsen,
schroeft u het deksel los van de
batterijhouder (aan de onderkant
van de slak) met een kruiskop-
schroevendraaier , en plaats 3 x
AA 1.5v (LR6) batterijen, zoals
weergegeven, gelet op de juiste
polariteit . Plaats het deksel
terug. Verwijder batterijen indien
het speelgoed gedurende langere
periode niet wordt gebruikt.
Breng het slakkenhuis op het
onderstuk aan , waarbij u zorgt
dat de groeven van het slakken-
huis op de wielen van het
onderstuk passen . Druk op de
knop van de staart en zie de
slak rollen terwijl het slakkenhuis
ronddraait op een leuk deuntje.
Het slakkenhuis is stapelbaar en
kan uit elkaar worden gehaald om
apart met de rammelaar, kralen
en piep te spelen, en kan
vervolgens opnieuw worden
gemonteerd. Druk op de knop om
de piep te activeren . Om de slak
te laten stoppen met rollen, drukt
u op de groene knop aan de
voorkant .
VERVANGING VAN DE BATTERIJEN
HOE TE SPELEN
8
Per inserire le batterie, svitare il
coperchio dello scomparto delle
batterie (nella parte inferiore della
chiocciola) con un cacciavite
Phillips ed inserire 3 batterie AA
da 1.5 V (LR6), come mostrato,
assicurandosi che la polarità sia
corretta . Rimettere a posto il
coperchio. Togliere le batterie
quando non si usa il giocattolo
per lunghi periodi.
Per giocare, mettere la casa sulla
schiena della chiocciola ,
assicurandosi che i denti ai lati
della casa siano allineati con le
ruote della chiocciola premere il
pulsante sulla coda della chiocciola
e guardarla mentre rotola
mente gira con una bella
musichetta. La casa è un gioco da
costruzione e si può separare
per giocare indipendentemente
con il sonaglio ed il fischietto, e
poi ricomporli. Premere il pulsante
arancione per azionare il
fischietto . per fermare la
chiocciola, premere il pulsante
verde sul davanti .
SOSTITUZIONE DELLE BATTERIE
COME GIOCARE
8
Zum Einsetzen der Batterien
schrauben Sie die Abdeckung des
Batteriefaches (an der Unterseite
der Schnecke) mit einem Philips-
Schraubendreher ab und setzen
Sie drei AA 1,5 Volt (LR6)
Batterien wie illustriert ein.
Vergewissern Sie sich, dass sie an
den richtigen Polen sitzen .
Befestigen Sie dann wieder die
Batterieabdeckung. Bitte
entfernen Sie die Batterien, wenn
das Spielzeug über einen längeren
Zeitraum nicht benutzt wird.
Zum Spielen platzieren Sie das
Schneckenhaus auf dem Rücken
der Schnecke . Stellen Sie dabei
sicher, dass sich die Rillen an den
Rändern des Schneckenhauses in
die Rillen an den Rädern der
Schnecke fügen . Drücken Sie
den Knopf auf dem Schwanz der
Schnecke , damit die Schnecke
davon rollt, während sich ihr
Schneckenhaus zur Musik dreht.
Das Schneckenhaus ist ein
Aufsatz, der zum Spielen
abgenommen und anschließend
wieder auf der Schnecke befestigt
werden kann . Drücken Sie
einfach den orangefarbenen
Knopf, um das Vogelküken zu
aktivieren .
Um das Rollen der Schnecke zu
stoppen, drücken Sie den grünen
Knopf an der Vorderseite .
BATTERIEWECHSEL
7
SPIELANLEITUNG
8
Para inserir as pilhas, retire a
tampa do compartimento das
pilhas (na parte de baixo do
caracol) com uma chave de
parafuso philips e inserir 3
pilhas AA 1.5V (LR6), como
demonstrado assegurando a
polaridade correcta . Recoloque
a tampa das pilhas. Por favor,
remova as pilhas quando o
brinquedo não estiver em uso por
longos períodos.
Para brincar, coloque o escudo nas
costas do caracol , garantindo
que as estrias estejam paralelas
em linha com as estrias do escudo
até as bordas do escudo sobre as
rodas do caracol . Pressione o
botão na cauda do caracol
para vê-lo rolar sob sua concha e
rodopiar à sua melodia encanta-
dora. O escudo é um empilhador
e pode ser separado para que
o chocalho, miçangas e delator
possam ser desempenhados com
independência, e em seguida,
re-montado. Basta pressionar
o botão laranja para ativar
o squeaker . Para parar o caracol
de rolar, pressione o botão verde
na frente .
SUBSTITUIÇÃO DAS PILHAS
COMO BRINCAR
8
Para incertar las pilas, abra la tapa
del compartimiento de pilas (en la
parte inferior del caracol) con un
destornillador Philips
e introduzca 3 pilas AA 1.5V (LR6),
como se muestrra en la figura,
con la polaridad correcta
.
Recoloque la tapa.
Remueva las pilas cuando el
juguete está en desuso durante
un período prolongado.
Para jugar, coloque la unidad
concha sobre la espalda del
caracol .
Compruebe que las ranuras de la
llanta de la concha combinan con
las ranuras de las ruedas del
caracol . Presione el botón que
se encuentra en la cola
del caracol y vea como se da
vuelta cuando la concha gira al
compas de una melodia encanta-
dora. La concha es apilable y
puede desmontarse para poder
jugar con el sonajero, los anillos y
la bozina por separado.
Presione el botón naranja para
activar la bocina .
Pare el caracol, presionando el
botón verde al frente .
REMPLACEMENT DES PILES
CÓMO JUGAR
8
Pour insérer les piles, dévisser la
porte du compartiment (situé
au-dessousde l'escargot) avec un
tournevis cruciform , insérer 3
piles AA/LR6 en respectant les
indications de polarité .
Refermer la porte du comparti-
ment à piles et serer fermement la
vis. Retirer les piles si le jeu n'est
pas utilize pendant une longue
période.
Pour jouer, place la coquille sur le
dos de l'escargot en t'assurant
que les crans situés sur celle-ci
s'imbriquent bien dans ceux situés
sur les roués de l'escargot .
Appuie sur la queue de l'escargot
et regarde-le advancer: sa
coquille tourney au son d'une
musique très rigolote!
Les deux coquilles peuvent être
utilisées indifféremment sur
l'escargot. La coquille avec les
anneaux à emplier peut être
utilisée séparément comme jouet
de sol. Chaque anneau deviant un
hochet avec des activités différen-
tes (texture, son…)! Appuie
simplement sur la petite tête
orange pour actionner un "Pouet
Pouet" .
Pour que l'escargot s'arrête,
appuie sur le bouton vert (face
externe) .
CAMBIO DE LAS PILAS
UTILIZATION
8
GB
FR
ES
PT
DE
IT
NL
RU
8
7
To insert the battaries, unscrew
the battery compartment cover
(on the underside of the snail)
with a Philips head screwdriver
and insert 3 X AA 1.5v (LR6)
batteries, as shown ensuring
correct polarity . Replace battery
cover. Please remove batteries
when this toy is not in use for
long periods
To play, place the shell unit on the
snail's back , ensuring that the
grooves on the shell rims line up
with the shell grooves on the
snail's wheels . Press the button
on the snail's tail and watch
him roll along as his shell spins
round to his enchanting tune. The
shell is a stacker and can be
separated for the rattle, beads
and squeaker to be played with
independently, then re-assembled.
Simply press the orange button to
activate the squeaker .
To stop the snail from rolling,
press the green button
on the front .
REPLACING THE BATTERIES
7
HOW TO PLAY
8
7
7
7
7
7
7
8
6
5
4
3
2
1
FCC STATEMENT: This device complies with part 15 of the FCC rules. Operation is subject to the following two conditions: (1) This device may not cause harmful
interference, and (2) This device must accept any interference received, including interference that may cause undesired operation. This equipment has been tested
and found to comply with the limits for Class B digital devices pursuant to Part 15 of the FCC rules.
These limits are designed to provide reasonable protection against harmful interference to radio communications, this equipment generates, uses and can radiate
radio frequency energy and, if not installed and used in accordance with the instruction, may cause harmful interference to radio communication. However, there is
no guarantee that interference will not occur in a particular installation. If this toy does cause interference to radio or television reception (you can check this by
turning the toy off and on while listening for the interference), one or more of the following measures may be useful: - Reorient or relocated the receiving antenna
- Increase the separation between the toy and the radio or the TV - Consult the dealer or experienced TV-radio technician for help.
NOTE: Changes, adjustments or modifications to this unit, including but not limited to, replacement of any transmitter component (crystal, semiconductor, etc.)
could result in a violation of FCC rules under part 15 and/or 95 and must be expressly approved by Spin Master LTD. or they could void the user's authority to
operate the equipment. Shielded cables must be used with this unit to ensure compliance with the Class B FCC limits.

Participe da conversa sobre este produto
Aqui você pode compartilhar o que pensa sobre Yookidoo Crawl n Go snail. Se você tiver alguma dúvida, primeiro leia atentamente o manual. A solicitação de manual pode ser feita através do nosso formulário de contato.