3
ENGLISH
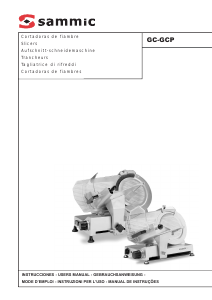
MODELS
This manual describes the installation,
operation and maintenance of the GC-220,
GC-250, GC-275, GC-300, GCP-250, GCP-
275, GCP-300 and GCP-350 Slicers.
The model reference and its specifications
are shown on the identification plate loca-
ted in the machine.
These slicer machines have been designed
and manufactured in accordance with the
following European directive: 89/392/EEC.
INSTALATION
For a suitable working operation and long
service life of the machine, follow the ins-
tructions contained in this manual.
Positioning
Place the slicer on a flat and firm area.
Small off-levels can be compensated by
means of the adjustable feet.
ELECTRIC INSTALATION
The slicers are single phase and are sup-
plied for 220V.
Before connecting the Slicer to the mains,
check if the motor is prepared for the same
voltage as the mains.
They must be EARTHED.
STARTING
1.Check if the Slicing control knob (A) is in
position "0".
2.Lay the goods on the Carriage (B), retai-
ning them with the Carriage handle set
(C).
3.Turn the Slicing control knob (A) till you
get the desired thickness.
4.Switch on the Start/stop switch (D) in
order to make the Blade (E) run and make
sure it rotates anti-clockwise.
Always use the Carriage handle set (C)
when you cut, never use your hands to
hold the goods during the cutting opera-
tion. Grasp the Pusher lever (F) to push
the Carriage (B).
5.When you have finished cutting, stop the
slicer by switching off the Start/stop
switch (D) and replace the Slicing control
knob (A) into position "0".
MAINTENANCE
Before cleaning, overhauling or repairing
the machine, it is necessary to unplug it
from the mains.
Sharpening de blade
This operation is essential to obtain a per-
fect cut and ensure a long service life of the
blade.
Sharpening the blade must be carried out
when the blade is clean only. Sharpening a
dirty blade would cause damage to both
blade and the grinding wheel, in addition
to poor results.
After sharpening the blade, brush the grin-
ding wheel to eliminate any food residues.
Besides, clean blade and grinding wheel
with an alcohol-impregnated cloth to remo-
ve all traces of grinding dust.
For correct sharpening, proceed as descri-
bed below:
1.Degrease both sides of the blade (E) with
an alcohol-impregnated cloth.
2.Pull on the sharpener set (H), loosening
Sharpener holder (G); turn it clockwise
180º. Fix the Sharpener set (H) tightening
Sharpener holder (G).
3.Switch on the machine and press the
Grinding abrasive pushbutton (I) to start
the grinding abrasive (J).
4.Press the Grindstone pushbutton (K) to
have the Grindstone (L) remove the burrs
that formed on the front edge of the
blade during sharpening.
IMPORTANT: Sharpening should last
about 20 seconds. Deburring should not
last more than 2 or 3 seconds.
5.Switch off the Start/stop switch (D) and
let down the Sharpener set (H) to its ori-
ginal storage position.
Cleaning
For hygiene reasons, the slicer must be
kept clean. It is therefore necessary to strip
down the machine and clean it at the end
of the workday as well as when changing
the sort of food to be cut.
1.Disconnect the slicer from the mains.
Simply switching off the Start/stop
switch (D) is not sufficient.
2.Place the Slicing control knob (A) in posi-
tion "0".
3.Clean the entire surface with a soft cloth
and hot and soapy water. Do not use
abrasives or dry detergents because they
would harm the anodized surface.
4.To clean the Blade (E), remove the Blade
guard (M) by unscrewing the Rosette tie
(N). Clean with an alcohol-impregnated
cloth.
5.To clean the Carriage set (B), unscrew
Carriage knob (O).
6.Lubricate all the slicing parts with non-
vegetable oil.
WARNING
1.Absolutely do not remove the security
Transparent guard (P).
2.Do not slice up material which is not
foodstuff.
3.If you want your machine to work pro-
perly, periodically check if the blade, the
sharpening stones and the drive belt are
in good conditions.
OTHER IMPORTANT REMARKS
-In the event the power supply cable should
get damaged and have to be replaced, the
repair may only be done by a SAMMIC
approved assistance service.
-The level of noise emission for a machine
working loaded, placed 1,6 metre high and
measured at a distance of 1 metre is less
than 70 dB (A). Backgrond noise: 32 dB (A).


Participe da conversa sobre este produto
Aqui você pode compartilhar o que pensa sobre Sammic GC-250 Fiambreira. Se você tiver alguma dúvida, primeiro leia atentamente o manual. A solicitação de manual pode ser feita através do nosso formulário de contato.