
REGISTER YOUR MELLERWARE WARRANTY
Thank you for purchasing a Mellerware product. Mellerware guarantees
that your product has been thoroughly inspected and tested before being
dispatched and is free from mechanical or electrical defects and complies
with the applicable safety standards. With every Mellerware product
purchased you will receive up to a 3 year warranty as detailed in the terms
and conditions below.
FIRST YEAR – 1 YEAR RETAIL WARRANTY
Should defects due to faulty parts or workmanship develop, under normal
domestic use, within 12 months from the original date of purchase please
return the product to the store from where it was purchased for a refund
or replacement at the discretion of the brand. Mellerware appliances are
intended for domestic use only and not for industrial or professional use.
The Warranty, if the product is used outside of domestic use or used in a
commercial environment, is reduced to 3 months with no extended war-
ranty available, all other terms and conditions applicable.
SECOND YEAR – OPTIONAL 1 YEAR ADDITIONAL EXTENDED
ONLINE WARRANTY REGISTRATION
Mellerware takes pride in its product quality and therefore offer an
extended 12 month warranty over and above the 1 Year Retail Warranty.
Should defects due to faulty material or workmanship develop, under normal
domestic use, after the initial 12 month period and within 24 months from
the original date of purchase, please return the product to Mellerware for
repair. Mellerware will assess and repair the product free of charge should
it be found to be a valid warranty claim and will return it to you directly.
Mellerware will replace a product with a similar product in the same or
better condition, if the repair cannot be conducted for whatever reason.
Should the product fall outside of the warranty, Mellerware will produce a
repair and delivery quotation for your approval.
NB: Registration should be completed at www.creativehousewares.co.za.
Should you experience any technical difculties you are welcome to
contact our customer service line on 086 111 5006 and one of our
consultants will gladly assist with the online warranty registration. Should
you not register the product within the 12 months of purchase, you will
automatically forfeit this extended warranty.
THIRD YEAR – OPTIONAL 1 YEAR ADDITIONAL EXTENDED
COMMUNICATION OPT IN WARRANTY
Mellerware takes pride in its product quality and therefore offer an addi-
tional 12 month warranty over and above the 1 Year Retail and 1 year
online registration warranty. Should defects due to faulty material or
workmanship develop, under normal domestic use, after the initial 12 month
period, the extended online registration 12 month period and within 36
months from the original date of purchase, please return the product to
Mellerware for repair. Mellerware will assess and repair the product free of
charge should it be found to be a valid warranty claim and will return it to
you directly. Mellerware will replace a product with a similar product in the
same or better condition, if the repair cannot be conducted for whatever
reason. Should the product fall outside of the warranty, Mellerware will
produce a repair and delivery quotation for your approval.
NB: Registration should be completed at www.creativehousewares.
co.za. Should you experience any technical difculties you are welcome
to contact our customer service line on 086 111 5006 and one of our
consultants will gladly assist with the online warranty registration and
opt-in email communication. Should you wish to qualify for the additional
third year extended warranty, you would need to have registered your
warranty within the rst 12 months from date of purchase and subscribed
to receive brand communication. The extended warranty is conditional
upon these requirements. Please note that you are however free to opt
out at any stage in accordance with the POPI act, this will however result
in you forfeiting this additional extended “communication opt in” warranty
from the recorded opt-out date.
Before returning your product, check the following:
• Your household mains supply socket is in good condition, working and
switched on.
• The mains supply circuit is not overloaded (white trip switch on your
DB board is off).
• You have read the trouble shooting guide in your Instructions for Use.
• All accessories and parts are present.
The following conditions apply:
1. Please ensure you retain your original receipt as this must be
presented when making a claim under the terms of the warranty.
It is impossible to determine the warranty period without proof of
purchase, so please keep this in a safe place. (NB. Your original receipt
can be scanned onto the Mellerware website [www.mellerware.co.za]
or Creative Housewares (Pty) Ltd [www.creativehousewares.co.za]
for safe storage.)
2. If a refund or exchange is required the product must be complete
with all accessories, parts and packaging. Missing parts will render the
warranty void. Any refund or exchange remains at the brands discre-
tion beyond the implied warranty granted by the CPA.
3. Upon receipt of your appliance, check it for any transport damage to
ensure it is safe for use. Return it to the store as soon as possible for
exchange if damaged. The warranty is void if products are damaged
after use, so please do not use a damaged product.
4. Any alteration made to the appliance purchased will void the warranty.
5. Your product is designed for normal domestic household use. Failure
to read and comply with the instructions for use, cleaning and
maintenance will render your warranty void, so please read these
instructions carefully to ensure your safety, and to get the most effec-
tive use from the product (e.g. not removing limescale; water deposits;
insect infestation, and/or burnt products).
6. Any abuse, negligent, improper or accidental use or care will render
the warranty void and Creative Housewares (Pty) Ltd will not be
liable for any loss or damage.
7. Any attempted repair, or replacement of unauthorised parts will ren-
der the warranty void, so please contact an authorised service centre
or service agent for any service or repair requirements.
8. NB: The warranty on replaced products will be from the original date
of purchase and not from when the date replacement was made.
9. All repairs carry a 3 month warranty even if this falls outside of the
warranty period.
10. Mellerware will attempt to conduct repairs within reasonable time,
this in line with industry standards but cannot be held responsible or
liable for any circumstances not under the brand’s control.
11. This warranty does not apply to glass components, lters, consum-
ables, and other parts subject to fair wear and tear.
Repairs out of the warranty period:
If service or repair becomes necessary outside the warranty period, this
service is still available however all transport/postage, spares and labour
costs will be for the customers’ account. All chargeable repairs will require
the customers’ written acceptance of the quote. Once the go-ahead has
been received Mellerware will undertake to conduct the repair within a
reasonable time and maintain the condition of the product as received. All
repairs carry a warranty of 3 months from the date of the repair.
For any service, enquiries and complaints, please contact our Customer
+27 63 014 0457 from 08h00 to 15h00 Monday to Friday excluding
public holidays.
Please also note that the company is normally closed for 2 weeks around
Christmas and New Year.
Please send all products to one of the listed service centres.
ONLINE WARRANTY REGISTRATION
WHY REGISTER YOUR WARRANTY?
Mellerware pride ourselves on bringing premium quality appliances to market, and as a commitment to this level of quality we offer up to a
3 year warranty (1 Year Retail + 1 Year Extended Online warranty registration + 1 Year Extended opt-in communication warranty) on all of
our products. To take advantage of the Free Extended Warranty options you will need to register your warranty online within the rst year
of purchase in order to make a valid claim. Now you can register your product, upload your warranty online and never have to worry about
losing your receipt again. Enjoy the benet of up to 3 year’s warranty.
ADDED BENEFITS
In addition to providing you with an online prole of your registered products we will also provide a host of value added benets:
• Discount voucher on product warranty registration
• Incentives and Competitions for registered users
• New recipes or ideas for your products
• New product developments - be the rst to get the latest appliances
• Special offers on promotional items
• Open your internet browser and visit
www.mellerware.co.za
• Click on the “Register” link and create your username and
password. Or if you have done this already login with your
username and password.
• Click on “Register your Warranty” and follow the easy
instructions.
• Scan and upload your receipt.
DESKTOP/
LAPTOP
• Open your internet browser and visit
www.creativehousewares.co.za
• Click on the “Register” link and and create your username and
password. Or if you have done this already login with your
username and password.
• Click on “Register your Warranty” and follow the easy instructions.
• Scan and upload your receipt.
SMART PHONE/
TABLET
National Service Centre: 086 111 5006
e-mail: help@chwsa.co.za
www.creativehousewares.co.za
Notes:
1. The online warranty system is a safe storage facility for your receipt.
2. You will be required to register on the Mellerware or Creative Housewares website. You will receive a username and password once
registered. This will give you access to your prole.
3. From your prole you will be able to load products that you have purchased. In order to successfully register your warranty you will
need to scan and upload your receipt to us.
4. All instructions on how to load your products are available inside your prole.
5. Please note that you must check that your receipt has been uploaded correctly. Creative Housewares cannot be held responsible for
faxes or les not received.
How to Register your Online Warranty?
1
Y
E
A
R
O
N
L
I
N
E
R
E
G
I
S
T
R
A
T
I
O
N
1
Y
E
A
R
R
E
T
A
I
L
W
A
R
R
A
N
T
Y
1
Y
E
A
R
C
O
M
M
U
N
I
C
A
T
I
O
N
O
P
T
-
I
N
terms & conditions applyterms & conditions apply
temperatuur gebruik het, anders brand u u klere op die strykyster.
Dit maak die waarborg ongeldig.
3.4. Droë stryk
3.4.1. Maak seker dat die temperatuur keuse op die laagste
vlak is.
3.4.2. Sit die strykyster op die steunbasis op ‘n vaste oppervlak.
3.4.3. Konnekteer aan kragtoevoer en draai die temperatuur knop
op die gewenste vlak, die gereed-liggie gaan aan.
3.4.4. Sodra die lig afskakel, kan u begin om te stryk op ‘n
stewige oppervlak
3.4.5. Draai die temperatuur knop weer na die laagste vlak as u
klaar is, ontkoppel van die krag toevoer en wag totdat die toestel
heeltemal afgekoel het voordat u dit stoor.
BELANGRIK: As die strykyster water in die tenk bevat en verkies
om droog te stryk, skuif die stoombeheer na “0”.
3.5. Stoomstryk
3.5.1. Maak seker dat die toestel van die krag teovoer ontkoppel
is. Vul die watertenk . Maak seker dat u die tenk nie te vol is nie.
3.5.2. Maak seker dat die temperatuur knop op die laagste vlak is
voordat u die apparaat inprop.
3.5.3. Sit die strykyster op sy steunbasis op ‘n stewige oppervlak.
3.5.4. Konnekteer aan kragtoevoer en stel die stoombeheer
hefboom op die medium vlak.
3.5.5. Draai die temperatuur knop op die gewenste vlak, geskik vir
stoom stryk, en die gereed-liggie moet brand.
3.5.6. Sodra die lig afskakel, kan u op ‘n vaste en ferm oppervlak
begin stryk.
BELANGRIK: Dit is belangrik om die lig te laat afgaan na die
optimale temperatuur bereik is, anders kan die apparaat lekkasie
veroorsaak
3.5.7. Nadat u klaar is met gebruik, draai u die temperatuur knop
weer op die laagste, ontkoppel van die kragtoevoer en wag totdat
dit heeltemal afgekoel het voordat u dit opberg.
OM DIE STOOMYSTER TE KOOP, MOET HOË TEMPERATUURS
GEKIES WORD BY DIE TEMPERATUUR-AANWYSER KNOP.
3.6. Sproei
Om klere te spuit, help om plooie glad te maak om strykwerk
makliker te maak.
3.6.1. Wys die punt van die strykyster waar u die water wil spuit
en druk die spuitknop.
3.6.2. Stryk die kledingstuk soos gewoonlik.
Om hierdie funksie te gebruik, is dit nodig om die watertenk vol
te maak.
3.7. Uitbarsting van stoom
Stoomstryk verminder die stryk tyd en versorg die apparaat.
3.7.1. Druk die stoomknoppie. Wag ‘n paar sekondes totdat
die stoom die vesels van die kledingstuk binnedring voordat u
weer op die knoppie druk. Moet nie meer as drie opeenvolgende
sarsies toedien vir ‘n optimale stoom gehalte nie.
3.7.2. Die spuitknop moet herhaaldelik ingedruk word om die
eerste bespuiting vry te laat.
3.8. Vertikale stryk
Dit is moontlik om hanggordyne, kledingstukke op hul eie hanger
te stryk, ens. Volg die onderstaande instruksies om dit te doen:
3.8.1. Kies die yster se maksimum temperatuur deur die yster se
temperatuur reguleerder kloksgewys te draai.
3.8.2. Stryk van bo na onder terwyl jy op die stoombeheer knop-
pie druk. BELANGRIK: Vir katoen en linne word aanbeveel dat die
onderkant van die strykyster met die materiaal in aanraking kom.
Vir ander fyner weefsels word aanbeveel om die basis van ‘n paar
sentimeter weg te hou.
3.9. Selfreiniging
3.9.1. Dit is belangrik om die apparaat ten minste een keer per
maand self skoon te maak om kalsium en al die opgeboude
minerale in die strykyster te verwyder.
3.9.2. Vul die watertenk tot op sy maksimum vlak.
3.9.3. Plaas die strykyster regop konnekteer aan krag toevoer en
kies die maksimum temperatuur.
3.9.4. Laat die apparaat warm word totdat die indikasie liggie
brand.
3.9.5.Ontkoppel van krag toevoer en plaas dit in die wasbak.
3.9.6. Laat die water deur die stoomopenings in die basis vloei
terwyl u die toestel liggies skud.
3.9.7. Los die knoppie na ‘n minuut of as die tenk leeg word.
3.9.8. Laat die strykyster regop staan totdat dit afgekoel het.
3.10. Ontkalking
3.10.1. Om die toestel korrek te laat werk, moet dit vry wees
van kalk- of magnesiuminkrusies wat veroorsaak word deur die
gebruik van harde water.
3.10.2. Om hierdie soort probleme te voorkom, beveel ons aan
die gebruik van water met min kalk of magnesium mineralisering.
3.10.3. Tuisgemaakte oplossings word nie aanbeveel vir ontkalk-
ing van hierdie apparaat, soos asyn nie.
4. Skoonmaak
4.1. Ontkoppel die toestel van die kragtoevoer en laat ditheeltemal
afkoel voordat u enige skoonmaakwerk doen.
4.2. Reinig die buitenste dele van die apparaat met ‘nklam lap met
‘n paar druppels afwasmiddel en droogdit dan af. WAARSKU-
WING! Moenie elektriese dele inenige vloeistof dompel nie.
4.3. Moenie oplosmiddels of produkte met ‘n suur of ‘nbasis-pH
soos bleikmiddel of skuurmiddels gebruik omdie apparaat skoon
te maak nie.
4.4. Moet nooit die apparaat in water of enige andervloeistof
dompel of onder lopende water plaas nie.
5. Berging
5.1. Maak seker dat u die strykyster afskakel is met dietemper-
atuur knop tot op die laagste vlak.
5.2. Plaas die strykyster in ‘n vertikale posisie bo-opdie basis, en
laat dit afkoel. Maak die watertenk leeg.
5.3. Rol die krag kabel liggies om die ondersteunen bêre die
produk op ‘n droë en koel plek, weg vandirekte sonlig.
6. Afwykings en herstel
6.1. Neem die toestel na ’n gemagtigde ondersteunings sentrum
as die produk beskadig is of as daar ander probleme is.
6.2. As die muurprop beskadig is, moet dit vervang word, en u
moet voortgaan soos u sou doen in die geval van skade.
7. Herwinning
7.1. Hierdie elektriese produkte, kabels, batterye, verpakking
en die handleiding moet nie met algemene huishoudelike afval
gemeng word nie. Vir behoorlike herwinning, neem hierdie
produkte na u naaste kantoor vir Creative Housewares, waar dit
gratis aanvaar word vir herwinning.
7.2. Kontak u plaaslike owerheid of huishoudelike vullisdiens vir
nadere besonderhede oor u naaste aangewese versamelingspunt.
Korrekte produkverwydering bespaar hulpbronne en voorkom
negatiewe gevolge vir menslike gesondheid en die omgewing.
------------------------------------------------------------------------------------------
English
Dear Customer
Thank you for choosing to purchase a Mellerware brand product.
Thanks to its technology, design and operation and the fact that it
exceeds the strictest quality standards, a fully satisfactory use and
long product life can be assured.
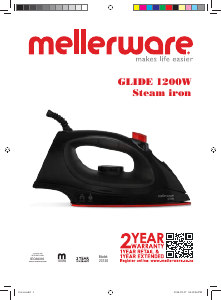
1. Parts description
1.Handle
2.Water inlet
3.Water tank
4.Temperature selection switch
5.Steam control / Self-cleaning lever
6.Spray button
7.Burst of steam button
8.Operation indicator light
9.Non-stick soleplate
10.Support base / cable reel
11.360° Swivel cord
2. Safety advice and warnings!
Read these instructions carefully before switching on the appliance
and keep them for future reference. Failure to follow and observe
these instructions could lead to an accident. Clean all the parts
of the product that will be in contact with food, as indicated in the
cleaning section, before use.
2.1. Use or working environment
2.1.1. Keep the working area clean and well lit. Cluttered and dark
areas invite accidents.
2.1.2. Use the appliance in a well-ventilated area.
2.1.3. Do not place the appliance on hot surfaces, such as cooking
plates, gas burners, ovens or similar items.
2.1.4. Keep children and bystanders away when using this
appliance surface and away from other heat sources and contact
with water.
2.1.5. Place the appliance on a horizontal, flat stable surface and
away from the other heat sources and contact with water.
2.1.6. Keep the appliance away from flammable material such as
textiles, curtains, cupboards or paper, etc.
2.1.7. Do not place the flammable material near the appliance.
2.1.8. Do not use the appliance in association with a programmer,
timer or other device that automatically switches it on.
2.1.9. Do not use the appliance if the cable or plug is damaged.
2.1.10. Ensure that the voltage indicated on the rating label
matches the mains power supply voltage before plugging in the
appliance.
2.1.11. Connect the appliance to the mains power supply with an
earth socket withstanding a minimum of 10 amperes.
2.1.12. The appliance’s plug must fit into the mains power supply
socket properly. Do not alter the plug.
2.1.13. If using a multi plug check ratings carefully as the current
used by several appliances could easily exceed the rating of the
multi plug.
2.1.14. If any of the appliance casings breaks, immediately discon-
nect the appliance from the mains power supply to prevent the
possibility of an electric shock.
2.1.15. Do not use the appliance if it has fallen on the floor or if
there are visible signs of damage.
2.1.16. Do not force the power cord. Never use the power cord to
lift up, carry or unplug the appliance.
2.1.17. Do not wrap the power cord around the appliance.
2.1.18. Do not clip or crease the power cord.
2.1.19. Do not allow the power cord to hang or to come into
contact with the hot surfaces of the appliance.
2.1.20. Check the state of the power cord. Damaged or tangled
cables increase the risk of electric shock.
2.1.21. The appliance is not suitable for outdoor use.
2.1.22. Power cord should be regularly examined for signs of dam-
age, and if the cord is damaged, the appliance must not be used.
2.1.23. Do not touch the plug with wet hands.
2.2. Personal safety
2.2.1. CAUTION: Do not leave the appliance unattended during use
as there is a risk of an accident.
2.2.2. Do not touch the heating parts of the appliance, as it may
cause serious injury.
2.2.3. This appliance is only for domestic use, not for industrial
or professional use. It is not intended to be used by guests in
hospitality environments such as bed and breakfast, hotels,
motels, and other types of
residential environments, even in farmhouses, areas of the kitchen
staff in shops, office and other work environments.
2.2.4. This appliance is not intended for use by persons (including
children) with reduced physical, sensory or mental capabilities, or
lack of experience
and knowledge, unless they have been given supervision or in-
struction concerning use of the appliance by a person responsible
for their safety.
2.2.5. This appliance is not a toy. Children should be supervised to
ensure that they do not play with the appliance.
2.2.6. Do not touch metal parts of the iron while it is in use, as it
may cause serious burns.
2.2.7. The temperature of the accessible surfaces may be high
when the appliance is in use.
2.3. Use and care
2.3.1. Fully unroll the appliance’s power cable before each use.
2.3.2. Do not use the appliance if the parts or accessories are not
properly fitted.
2.3.3. Do not turn the appliance over while it is in use or connected
to the mains power supply.
2.3.4. Unplug the appliance from the mains power supply when not
in use and before undertaking any cleaning task.
2.3.5. This appliance should be stored out of reach of children.
2.3.6. Do not store the appliance if it is still hot.
2.3.7. Never leave the appliance unattended when in use and keep
out of the reach of children.
2.3.8. If for some reason, the appliance were to catch fire, discon-
nect the appliance from the mains power supply and DO NOT USE
WATER PUT THE FIRE OUT.
2.3.9. To keep the non-stick treatment in good condition, do not
use metal or pointed utensils on it.
2.3.10. Respect the MAX level indicator (Fig. 1)
2.3.11. Unplug the appliance from the mains before refilling the
water tank.
2.3.12. To ensure that the iron functions correctly, keep the iron
face smooth and do not hit it against metallic objects (for example,
the ironing board, buttons, zips).
2.3.13. The use of distilled water is recommended, especially if the
water in your area contains any type of grit or is “hard” (contains
calcium or magnesium).
2.3.14. The water fill-up opening must not be left open while the
iron is being used.
2.4. Service
2.4.1. Make sure that the appliance is service only suitably quali-
fied technician, and that only original spare parts or accessories
are used to replace existing parts/accessories.
2.4.2. If the power cord is damaged, the manufacturer or its
service agent, or similarly qualified person must replace it in order
to avoid a hazard.
2.4.3. Any misuse or failure to follow the instructions for use
renders the guarantee and the manufacturer’s liability null and void.
3. Instructions for use
3.1. Before use
3.1.1. Remove the appliance’s protective film (if applicable).
3.1.2. Before using the product for the first time, cleanin the man-
ner described in the cleaning section.
3.1.3. The first time the appliance is used a light smoke may be
detected.
3.2. Filling with water
3.2.1. Unplug the iron before filling the water tank.
3.2.2. Hold the iron in a horizontal position.
3.2.3. Slowly pour water through the water inlet.
3.2.4. Do not fill past the “MAX” mark on the water tank.
NOTE: Your iron is designed to use tap water, however, if the water
is very hard, it is advisable to use distilled water. The water tank
should be emptied after each use.
3.3. Use
3.3.1. Always check whether a label with ironing instructions is
attached to the clothing article to be ironed. Follow these instruc-
tions in all cases.
3.3.2. Turn the temperature control dial to set the ap- propriate
temperature indicated in ironing instructions or in fabric label.
3.3.3. Insert the plug into the wall socket. The indicator light will
illuminate.
3.3.4. When the indicator light switches off you may start ironing.
CAUTION: Iron from low temperature first then move to high
temperature fabrics. Should you need to iron at a low temperature,
after using a high temperature you must wait for the pilot light to
illuminate again, or you will burn your clothes onto the iron. This
will void the warranty.
3.4. Dry ironing
3.4.1. Make sure the temperature selection knob is at the lowest
level.
3.4.2. Set the iron on the support base on a steady, firm surface.
3.4.3. Plug the appliance to the electrical power supply and turn
temperature selection knob to desired level, the ready indicator
light will turn on.
3.4.4. Once the light turns off, you may star to iron over steady
and firm surface.
3.4.5. When you have finished, turn the temperature knob back to
the lowest level, unplug from the electrical power supply and wait
until the appliance cools down completely, before you proceed
to store it.
IMPORTANT: If the iron contains water inside the tank and you
prefer dry ironing, move the steam control lever to “0” position.
3.5. Steam ironing
3.5.1. Make sure the appliance is unplugged from the electric
power supply, fill up the water tank. Make sure not to overfill the
tank.
3.5.2. Ensure the temperature selection knob is at the lowest level,
before plugging in the appliance.
3.5.3. Set the iron on its support base on a steady and firm
surface.
3.5.4. Plug in the iron and set the steam control lever to the
medium level.
3.5.5. Turn the temperature selection knob to the desired level,
suited for steam generation and the ready indicator light should
turn on.
3.5.6. Once the light turns off you may start ironing on a steady
and firm surface.
IMPORTANT: It is important to let the light to turn after reaching
the optimal temperature, otherwise the appliance may experience
leakage
3.5.7. Once you have finished its use, turn the
temperature selection knob back to the lowest, unplug the appli-
ance from the electrical power supply and make sure to wait until
completely cools down before storing it.
IN ORDER TO STEAM IRON, HIGH TEMPERATURES SHOULD BE
SELECTED AT THE TEMPERATURE INDICATOR KNOB.
3.6. Spray
Spraying garments helps smooth out wrinkles to make ironing
easier.
3.6.1. Point the tip of the iron where you want to spray the water
and press the spray button.
3.6.2. Iron the garment as usual. To use this function, it will be
necessary to fill the water tank.
3.7. Burst of steam
Steam ironing reduces ironing time and takes care of the appliance.
3.7.1. Press the burst of steam button. Wait a few seconds until
the steam penetrates the fibres of the garment before pushing the
button again. For optimum steam quality, do not apply more than
three successive bursts.
3.7.2. The spray button has to be pressed repeatedly to release
the first spray.
3.8. Vertical ironing
IIt is possible to iron hanging curtains, items of clothing on their
own hanger, etc. To do so, follow the below instructions:
3.8.1. Select the irons maximum temperature by turning the iron’s
temperature regulator clockwise.
3.8.2. Iron from top to bottom while pressing the steam control
button. Important: for cotton and linen, it is recommended to put
the base of the iron in contact with the material. For other more
delicate fabrics, it is recommended to keep the base of the a few
centimetres away.
3.9. Self-cleaning
3.9.1. It is important to self-clean the appliance at least once a
month to remove calcium and any the built-up minerals inside
the iron.
3.9.2. Fill the water tank to its maximum level.
3.9.3. Place the iron in an upright position, plug into the mains
and select the maximum temperature.
3.9.4. Leave the appliance to heat up until the indicator light
turns off.
3.9.5. Unplug the appliance and place it in the sink.
3.9.6. Let the water flow out through the steam vents in the base,
while lightly shaking the appliance.
3.9.7. Release the button after a minute or when the tank
becomes empty.
3.9.8. Leave the iron in the upright position until it has cooled.
3.10. How to deal with scale build up
3.10.1. For the appliance to work correctly it should be kept free
of lime scale or magnesium incrustations
cause by the use of hard water.
3.10.2. To prevent this kind of problem, we recom-mend the use
of water with low lime or magnesium mineralization.
3.10.3. Homemade solutions are not recommended for descaling
this appliance, such as vinegar.
4. Cleaning
4.1. Disconnect the appliance from the mains powersupply and
allow it to cool completely before undertaking any cleaning task.
4.2. Clean the outer parts of the appliance with a dampcloth with
a few drops of washing-up liquid and thendry. CAUTION! Do not
immerse electrical parts of theappliance in any liquid.
4.3. Do not use solvents, or products with an acidor base pH
such as bleach, or abrasive products, forcleaning the appliance.
4.4. Never submerge the appliance in water or anyother liquid or
place it under running water.
5. Storage
5.1. Make sure the to turn off the iron by the temperature selec-
tion knob to the lowest level.
5.2. Set the iron in a vertical position on top of its basesupport
and let is cool itself completely. Make sure toempty the water
tank.
5.3. Roll the power cord gently around its base supportand store
the product on a dry and cool place, awayfrom direct sunlight.
6. Anomalies and repair
6.1. Take the appliance to an authorised support centre if product
is damaged or other problems arise.
6.2. If the connection to the mains has been damaged, it must
be replaced, and you should proceed as you would in the case
of damage.
7. Recycling
7.1. These electrical products, cables, batteries, packaging, and
the manual, should not be mixed with general household waste.
For proper recycling, please take these products to your nearest
Creative Housewares office where they will be accepted for
recycling free of charge.
7.2. Alternatively, please contact your local authority or household
waste disposal service for further details of your nearest
designated collection point. Correct product disposal saves
resources and prevents negative effects on human health and
the environment.
------------------------------------------------------------------------------------------
Afrikaans
Geagte kliënt,
Dankie vir u keuse om ’n Mellerware handelsmerk produk te koop.
Danksy die tegnologie, ontwerp en werking en die feit dat dit vol-
doen aan die strengste gehalte standaarde, is U verseker van ’n
volle bevredigende gebruik en lang produklewe.
1. Parte beskrywing
1.Handvatsel
2.Water inlaat
3.Water tenk
4.Temperatuur seleksie knop
5.Stoom kontrole/ self-skoonmaak hefboom
6.Sproei knoppie
7.Stoom knoppie
8.Indikasie lig
9.Kleefvrye zoolplaat
10. Krag koord/ staan basis
11. Rotasie bal
2. Veiligheidsadvies en waarskuwings!
Lees hierdie instruksies sorgvuldig deur voordat u die toestel aan-
skakel en hou dit vir toekomstige verwysing. Versuim om hierdie
instruksies te volg en op te let kan lei tot ’n ongeluk.
2.1. Gebruik of werksomgewing
2.1.1. Hou die werkarea skoon en goed belig. Deurmekaar en
donker gebiede lok ongelukke.
2.1.2. Gebruik die toestel in ’n goed geventileerde area.
2.1.3. Plaas die toestel nie op warm oppervlaktes, soos kook-
plate, gasbranders, oonde of soortgelyke voorwerpe nie.
2.1.4. Hou kinders en omstanders weg as u die oppervlak van
die apparaat gebruik en weg van ander hittebronne en met water
in aanraking kom.
2.1.5. Plaas die toestel op ’n horisontale, plat, stabiele oppervlak
en weg van die ander hittebronne en kontak met water.
2.1.6. Hou die toestel weg van vlambare materiaal soos tekstiele,
gordyne, kaste of papier, ens.
2.1.7. Moenie die vlambare materiaal naby die toestel plaas nie.
2.1.8. Moenie die toestel gebruik in samewerking met ’n
programmeerder, tydhouer of ander toestel wat dit outomaties
aanskakel nie.
2.1.9. Moenie die toestel gebruik as die kabel of die stekker
beskadig is nie.
2.1.10. Maak seker dat die spanning wat op die etiket aangedui
word, ooreenstem met die netspanning voordat u die apparaat
insit.
2.1.11. Konnekteer aan die hoof kragtoevoer met ’n minimum
van 10 ampère.
2.1.12. Die muurprop van die toestel moet behoorlik in die hoof
prop pas. Moenie die prop verander nie.
2.1.13. As u ’n multi-prop gebruik, moet u die graderings nou-
keurig nagaan, aangesien die stroom wat deur verskeie toestelle
gebruik word, die gradering van die multi-plug maklik kan oorskry.
2.1.14. As enige van die omhulsels van die apparaat breek, moet u
die toestel dadelik van die stroomkrag koppel om die moontlikheid
van ’n elektriese skok te voorkom.
2.1.15. Moenie die apparaat gebruik as dit op die vloer geval het of
as daar sigbare tekens van skade is nie.
2.1.16. Moenie die krag prop indwing nie. Gebruik nooit die krag-
kabel om die toestel op te lig, te dra of uit te trek nie.
2.1.17. Moenie die kragkabel om die toestel draai nie.
2.1.18. Moenie die kragkabel knip of kreukel nie.
2.1.19. Moenie dat die kragkabel hang of met die warm oppervlak-
tes van die toestel in aanraking kom nie.
2.1.20. Gaan die toestand van die kragkabel na. Beskadigde of
deurmekaar kabels verhoog die risiko van elektriese skok.
2.1.21. Die apparaat is nie geskik vir buitegebruik nie.
2.1.22. Die kragkabel moet gereeld ondersoek word vir tekens van
skade, en as die kabel beskadig is, moet die apparaat nie gebruik
word nie.
2.1.23. Moenie die prop met nat hande aanraak nie.
2.2. Persoonlike veiligheid
2.2.1. WAARSKUWING: Moenie die apparaat tydens gebruik
sonder toesig laat nie, want die gevaar van ’n ongeluk bestaan.
2.2.2. Moenie aan die verwarm dele van die apparaat raak nie,
want dit kan ernstige beserings veroorsaak.
2.2.3. Hierdie apparaat is slegs vir huishoudelike gebruik, nie vir
industriële of professionele gebruik nie. Dit is nie bedoel om deur
gaste in gasvryheidsomgewings soos bed en ontbyt, hotelle,
motelle en ander soorte residensiële omgewings gebruik te word
nie, selfs nie in plaashuise, in die kombuispersoneel in winkels,
kantoor- en ander werkomgewings nie.
2.2.4. Hierdie apparaat is nie bedoel vir gebruik deur persone
(insluitend kinders) met beperkte fisiese, sensoriese of geestelike
vermoëns, of gebrek aan ervaring en kennis nie, tensy hulle toesig
of instruksies gegee het oor die gebruik van die toestel deur
iemand wat verantwoordelik is vir hul veiligheid.
2.2.5. Hierdie toestel is nie ’n speelding nie. Kinders moet onder
toesig wees om te verseker dat hulle nie met die apparaat speel
nie.
2.2.6. Moenie aan die metaal van die yster raak terwyl dit gebruik
word nie, want dit kan ernstige brandwonde veroorsaak.
2.2.7. Die temperatuur van die toeganklike oppervlaktes kan hoog
wees as die apparaat gebruik word.
2.3. Gebruik en versorging
2.3.1. Rol die kragkabel van die toestel voor elke gebruik volledig
uit.
2.3.2. Moenie die toestel gebruik as die onderdele of toebehore nie
behoorlik aangebring is nie.
2.3.3. Moenie die apparaat omdraai terwyl dit in gebruik is of aan
die hoofkrag gekoppel is nie.
2.3.4. Ontkoppel van kragtoevoer voordat u enige skoonmaakwerk
doen.
2.3.5. Hierdie toestel moet buite die bereik van kinders geberg
word.
2.3.6. Moenie die toestel berg as dit nog warm is nie.
2.3.7. Laat die toestel nooit sonder toesig tydens gebruik nie en
hou dit buite bereik van kinders.
2.3.8. As die apparaat om die een of ander rede aan die brand sou
raak, koppel die apparaat los van die netstroomtoevoer en gebruik
GEEN WATER OM DIE BRAND TE SLUIT NIE.
2.3.9. Moenie metaal of skerp gereedskap gebruik om die kleefvrye
part skoon te maak nie.
2.3.10. Neem kennis van die MAX-vlakaanwyser (Fig. 1).
2.3.11. Ontkoppel van krag toevoer voordat u die watertenk
volmaak.
2.3.12. Om te verseker dat die strykyster korrek funksioneer, hou
die strykyster glad en moenie dit oormetaalvoorwerpe stryk nie
(byvoorbeeld die strykplank, knope, ritsies).
2.3.13. Die gebruik van gedistilleerde water word aanbeveel, veral
as die water in u omgewing gruis bevat of ‘hard’ is (kalsium of
magnesium bevat).
2.3.14. Die wateropvullings opening mag nie oopgelaat word
terwyl die strykyster gebruik word nie.
2.4. Diens
2.4.1. Maak seker dat die toestel slegs deur ’n toepaslike gekwalifi-
seerde tegnikus gebruik word en dat slegs oorspronklike onderdele
of bykomstighede gebruik word om bestaande onderdele/toebe-
hore te vervang.
2.4.2. As die kragkoord beskadig is, moet die vervaardiger of sy
diensagent of ’n soortgelyke gekwalifiseerde persoon dit vervang
om gevaar te voorkom.
2.4.3. Enige misbruik of versuim om die gebruiksaanwysings
te volg, maak die waarborg en die aanspreeklikheid van die
vervaardiger nietig.
3. Instruksies vir gebruik
3.1. Voor gebruik
3.1.1. Verwyder die toestel se beskermende film(indien van
toepassing).
3.1.1. Voordat u die produk die eerste keer gebruik,moet u dit
skoonmaak op die manier wat in die skoonmaakafdeling beskryf
word.
3.1.2. Die eerste keer dat die apparaat gebruik word,kan ‘n ligte
rook bespeur word.
3.2. Water opvul
3.2.1. Ontkoppel die strykyster uit voordat u die watertenk
volmaak.
3.2.2. Hou die strykyster in ‘n horisontale posisie.
3.2.3. Giet water stadig deur die water inlaat.
3.2.4. Moenie oor die”MAX” -merk op die watertenk volmaak nie.
OPMERKING: u strykyster is ontwerp om kraanwater te gebruik,
maar as die water baie hard is, is dit raadsaam om gedistilleerde
water te gebruik. Die watertenk moet na elke gebruik leeggemaak
word.
3.3. Gebruik
3.3.1. Kyk altyd of ‘n etiket met strykinstruksies op die kledingstuk
wat u moet stryk, aanbring. Volg hierdie instruksies.
3.3.2. Draai die temperatuur knop om die toepaslike temperatuur
vandie strykinstruksies of op die etiket van die stof aan te dui.
3.3.3. Konnekteer aan die krag toevoer. Die liggie sal brand.
3.3.4. As die liggie afskakel, kan u begin stryk.
WAARSKUWING: Stryk eers van lae temperatuur en beweeg dan
na hoë temperatuur materiaal. As u op ‘n lae temperatuur moet
stryk, moet u wag totdat die vlieënier weer brand, nadat u ‘n hoë
LABEL TYPE OF TEXTILE
Do not iron this article
•
••
Synthetics, Nylon, Acrylics, Polyester, Rayon
Wool, Silk
••• Cotton, Linen
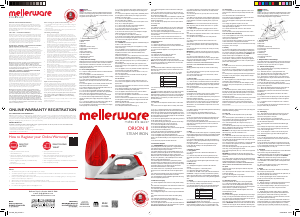
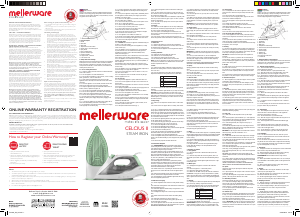
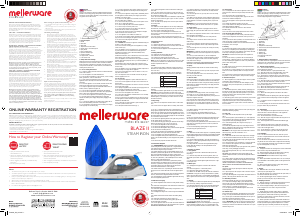
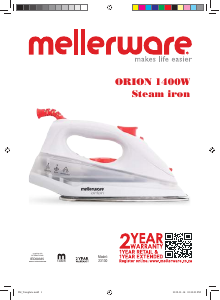
ORION II
STEAM IRON
1
Y
E
A
R
O
N
L
I
N
E
R
E
G
I
S
T
R
A
T
I
O
N
1
Y
E
A
R
R
E
T
A
I
L
W
A
R
R
A
N
T
Y
1
Y
E
A
R
C
O
M
M
U
N
I
C
A
T
I
O
N
O
P
T
-
I
N
terms & conditions applyterms & conditions apply
Model:
23140A
1400W
complies with
INTERNATIONAL
IEC60335
SAFETY SPECIFICATIONS
ETIKET TIPE TEKSTIEL
Moenie die artikel stryk nie
•
••
Sinteties, Nylon, Akriel, Poliëster, Rayon
Wol, Sy
••• Katoen, Linne
23140A_IM_A3.indd 1
2022/08/23 09:51


Participe da conversa sobre este produto
Aqui você pode compartilhar o que pensa sobre Mellerware 23140A Orion II Ferro. Se você tiver alguma dúvida, primeiro leia atentamente o manual. A solicitação de manual pode ser feita através do nosso formulário de contato.