
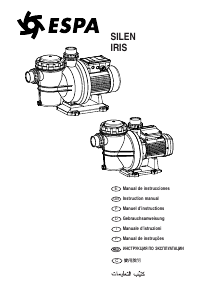
INSTRUCTION MANUAL
Safety precautions
This symbol together with one of the following words
“Danger” or “Warning” indicates the risk level deriving from failure to observe
the prescribed safety precautions:
DANGER Warns that failure to observe the pre
risk of cautions involves a risk of electric
electric shock shock.
DANGER Warns that failure to observe the pre-
cautions involves a risk of damage to
persons and/or things.
WARNING Warns that failure to observe the precau-
tions involves the risk of damaging the
pum and/or the plant.
1. GENERAL
The purpose of these instructions is to ensure the correct installation and best
performance of our pumps.
These are single cell centrifugal pumps with built-in filter elements, especially
designed for prefiltering and recirculation of water in swimming pools.
They are designed to operate with clean water at a maximum temperature of
35°C.
All materials used are of top quality; they are subjected to strict, controls and
verified to extremely demanding standards.
Correct compliance with the installation and operation instructions, and with
the electrical connection diagrams, will prevent motor overloads and the con-
sequences of all types that could otherwise result, consequences for which we
decline all responsability.
2. INSTALLATION
The installation of these electric pumps is only permitted in swimming
pools or ponds that comply with standards IEC 60364-7-702 and/or the
national regulations of the country in witch the product is to be installed
The pump must be installed in horizontally, at least two metres from
the wall of the pool, and at the same height as the level of the water, or
if possible, below.
It is not advisable to install the pump at more than 3 m geometrical
height from water level.
Independently of the geometrical height and the power of the model
chosen, self-priming times may be up to 10 min.
The pump must be fixed on a firm base, with screws of 6 or 8 mm dia-
meter, through the prepared holes in the foot.
The pump should be protected from possible flooding and receive dry
ventilation.
3. INSTALLING THE LINES
The supports of the suction and discharge lines will be independent of those
of the pump.
In the case of plastic lines, ensure tightness of joints and threads with
TEFLON tape alone. Glue or similar products should not be used.
The suction line should have a diameter equal to or greater than that of the
suction mouth of the pump.
The inside of the suction and discharge holes is threaded to a certain depth.
This depth should not be exceeded when screwing on the respective lines.
Only new or clean connectors should be used.
The suction lines should be structured with a slight slant to prevent the for-
mation of siphons.
4. ELECTRICAL CONNECTION
The electrical installation should have a multiple separation system
with contact opening of a least 3 mm.
The pump should have a power supply via a circuit with a residual
current circuit breaker device (RCD) with an operating value no
higher then 30mA. The installation of this type of electrical pump is only
authorised for pools or tanks wich comply with the regulation CEI 60364-
7-702 and/or the regulations applicable in the country where the product is
to be installed (in France: NFC 15-100). In case of doubt consult with a
Single-phase motors will be equipped with built-in thermal protection.
In the case of three-phase motors, the user should provide thermal
protection complying with the installation rules in force.
The diagrams in Fig. (1) will allow correct electrical connection.
5. VERIFICATIONS PRIOR TO INITIAL START-UP
After making the connections defined in the preceeding section, uns-
crew the filter cover and fill the pump prefilter with water to the bot-
tom level of the suction line.
Verify that the pump shaft turns freely.
Verify that the mains voltage and frequency match those specified on
the nameplate of the pump.
Set the prefilter cover back in place and screw it to a suitable tight-
ness.
Check that the turning direction of the motor matches that specified
on the fan cover. In threephase motors, if the turning direction is inco-
rrect, reverse two supply phases on the protection panel.
If the motor does not start, try to determine the cause of the irregu-
larity by consulting the list of common faults and their possible solu-
tions, provided in this manual.
NEVER RUN THE PUMP DRY.
6. STARTING
Open all the gate valves and put the motor under voltage. Wait a reasonable
time to allow self-priming. Verify the breakaway current and suitable adjust
the thermal relay.
7. MAINTENANCE
Our pumps do not require any specific maintenance. It is advisable,
however, to periodically clean the pump filter and to empty the pump
housing in low-temperature periods through the blowoff plug. If the
pump is to remain idle, it is advisable to empty and clean it, and then
reinstall the filter cover with petroleum jelly on the rubber gasket,
taking measures to ensure that the place where the pump is to be sto-
red will remain dry and ventilated.
In the event of breakdown, the user must in no event handle the
pump, but must contact an authorised technical service.
When the time comes to dispose of the pump, it contains no toxic or
contaminating materials.The principal components are duly identified
for selective breaking.
3
(in France: NDF 15-100)In cases of doubt, please consult your specialist
It is obligatory to connect the power supply cable to the pump motor
with the corresponding terminals. For exterior installation, the cable
must be at least of the "H07 RN-F".
The power supply socket for the apparatus must be at least 3.5m
from the pool


Participe da conversa sobre este produto
Aqui você pode compartilhar o que pensa sobre ESPA Iris Bomba de piscina. Se você tiver alguma dúvida, primeiro leia atentamente o manual. A solicitação de manual pode ser feita através do nosso formulário de contato.
responder | Isso foi útil (0) (Traduzido pelo Google)