
ENGLISH
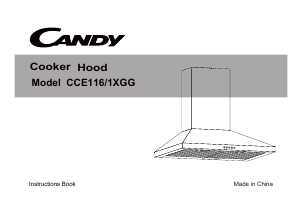
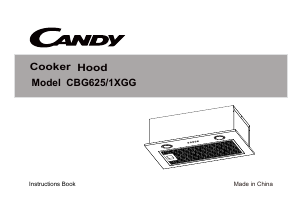
DESCRIPTION
The hood may be installed in the filtering or the ducting version.
Filtering version (Fig. 1): The hood aspirates the kitchen air saturated with fumes and odours, purifies it through the
grease filters and charcoal filters and returns clean air into the room. WARNING: When using filtering hoods, both
charcoal filters and an air baffle must be used; located in the upper part of the telescopic structure, this baffle recycles
the air to the environment (Fig. 1A). For constant efficiency, the charcoal filters must be replaced periodically. The
charcoal filters are not supplied.
Ducting version (Fig. 2): The hood aspirates the kitchen air saturated with fumes and odours, passes it through the
grease filters and expels it to the outside through a disposal duct. With this version the charcoal filters are not required.
Decide from the start on the type of installation (filtering or ducting). For greater efficiency, we recommend you
install the hood in the ducting version (if possible).
INSTALLATION
ATTENTION: Three people are required for proper installation; the unit should be installed by a qualified
operator. Also follow carefully each step of the assembly instructions, and once installation has been
completed, make sure that the hood is firmly secured in place.
Remove the grease filters before proceeding with the assembly instructions. This will make the appliance easier
to handle. Grease filters removal (Fig. 3): this is carried out by pushing the relative catch inwards and turning it
downwards until it disengages from the supports.
INSTALLATION IN DUCTING VERSION:
Before fixing, the
disposal duct for air evacuation to the outside must be installed. Use a disposal duct with: –
minimum indispensable length; – minimum possible bends (maximum angle of bend: 90°); – certified material (according
to the State); – an as smooth as possible inside. It is also advisable to avoid any drastic changes in pipe cross-section
(recommended diameter: 150 mm). For air evacuation to the outside, follow all the other instructions given on the
“Warnings” sheet.
Prepare the power supply within the telescopic structure (for the electrical connection, follow all the other instructions
on the “Warnings” sheet).
ASSEMBLING - Using the special drilling template, drill the holes for fixing to the ceiling on the vertical side of
your hob. Carefully observe all the indications for final positioning of the apparatus. Take into account that one of the
template axes must correspond to the axis of the hood controls. Fix the bracket to the ceiling using the screws and
screw anchors provided (Fig. 4).
Fix the telescopic structure to the bracket by means of 4 screws (provided), running the air evacuation pipe through
the telescopic structure and the electric power cable through the special hole in the bracket (Fig. 5). The air evacuation
pipe is not supplied.
Adjust the height of the telescopic structure by means of the four retaining screws C (Fig. 6), taking into account that
the height of the hood is 310 mm and that the distance between the hood and the hob must be at least 650 mm
(Fig.7). Take the upper flue (with the round slots) and fix it on the telescopic structure with the slots facing downwards;
fix the flue to the bracket with 2 screws (Fig. 8). Take the lower flue and fix it in the same manner as before; slide
it to the top and stop it in that position using a screw inserted in the hole of the upper flue as a catch (Fig. 9).
Take the flange with the metal valve (Fig. 10H) and assemble it onto the hood air disposal opening, pressing slightly.
Fix the hood to the telescopic structure by means of 4 nuts (provided) – Fig. 11.
Fix the air evacuation pipe to flange H through opening D (Fig. 12) by means of a metal ring (pipe and ring are not
supplied).
Make the electrical connection by means of the power cable. Remove the screw used as catch and slide the lower
flue downwards, placing it gently on the apparatus.
Installation is now complete and the grease filters can be reassembled.
INSTALLATION IN FILTERING VERSION:
Prepare the power supply within the telescopic structure (for the electrical connection, follow all the other instructions
on the “Warnings” sheet).
ASSEMBLING - Using the special drilling template, drill the holes for fixing to the ceiling on the vertical side of
your hob. Carefully observe all the indications for final positioning of the apparatus. Take into account that one of the
template axes must correspond to the axis of the hood controls. Fix the bracket to the ceiling using the screws and
screw anchors provided (Fig. 4).
Fix the telescopic structure to the bracket by means of 4 screws (provided), running the electric power cable through
the special hole in the bracket (Fig. 5). Adjust the height of the telescopic structure by means of the four retaining
screws C (Fig. 6), taking into account that the height of the hood is 310 mm and that the distance between the hood
and the hob must be at least 650 mm (Fig. 7). Insert the air baffle (F) in the structure (Fig. 13). Through the openings
E (Fig.13), fix the flange (G) to the baffle (F) locking it with a turning movement. Fix a flexible pipe to the flange (G)
for air evacuation (Fig. 14). The air evacuation pipe is not supplied.


Participe da conversa sobre este produto
Aqui você pode compartilhar o que pensa sobre Candy CA CISD 93 X Exaustor. Se você tiver alguma dúvida, primeiro leia atentamente o manual. A solicitação de manual pode ser feita através do nosso formulário de contato.