Media Tablet
FR
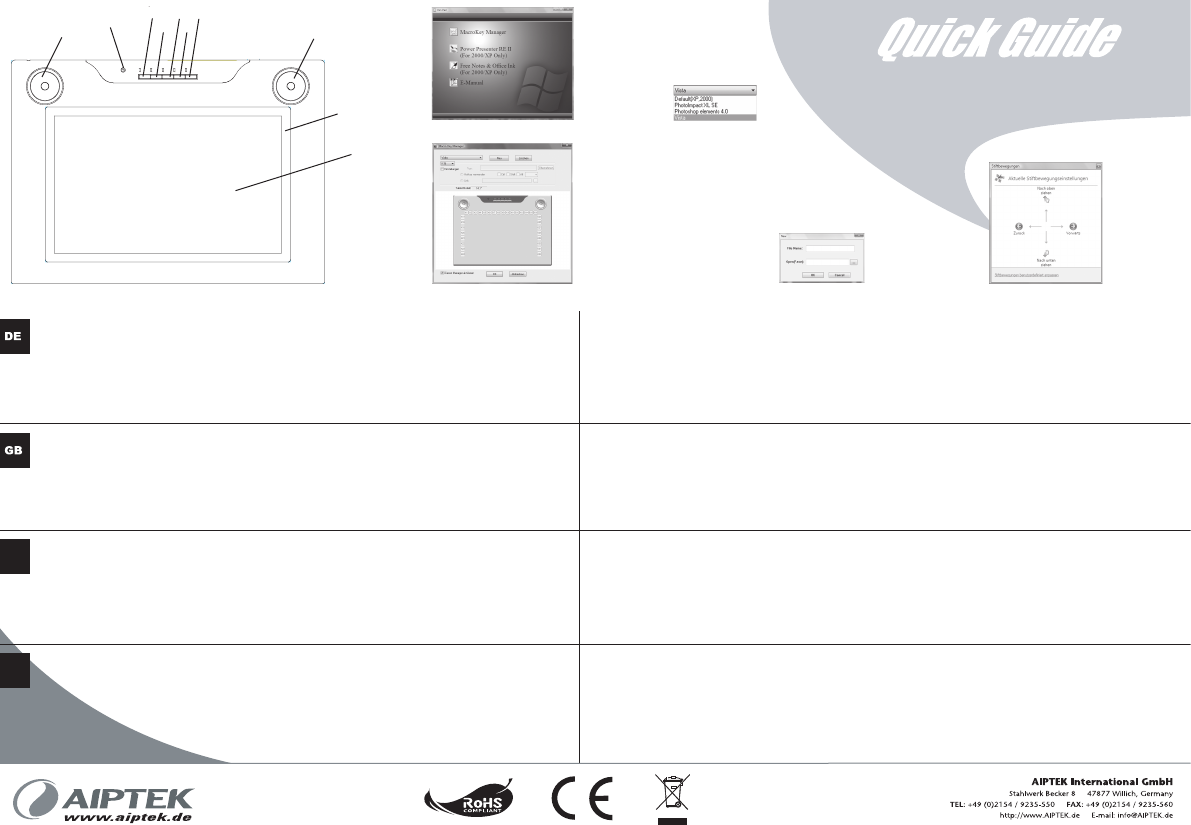
Schritt 1. Installation
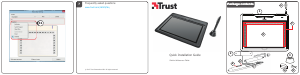
1. Bevor Sie das Media Tablet verwenden können, sollten Sie die mitgelieferte Software installieren. Legen Sie hierzu die CD-Rom in Ihr CD-Laufwerk und starten Sie die “Setup.exe”.
Das oben abgebildete Fenster (Abb. 2) öffnet sich.
2. Klicken Sie auf “MacroKey Manager” und befolgen Sie die Anweisungen auf Ihrem Bildschirm. Nachdem Sie die Installation abgeschlossen haben, erscheint vor dem Icon
des “MacroKey Manager” ein rotes Häckchen. Die beiden weiteren Programme können Sie ebenfalls installieren, wenn Sie Microsoft Windows 2000 oder XP verwenden.
Für den Gebrauch mit Microsoft Windows Vista wird dies nicht empfohlen.
3. Danach erscheint das “MacroKey Manager”-Icon in der Taskleiste unten rechts. Nun können Sie das Media Tablet über das USB-Kabel mit Ihrem PC verbinden. Sobald Microsoft
Windows Vista das Tablet erkannt hat, erscheint rechts neben dem “MacroKey Manager”-Icon das “Stiftbewegungen”-Icon. Sie können nun beginnen Ihr Media Tablet Ihren
Bedürfnissen anzupassen.
Schritt 2. Konfiguration und Funktionen des Media Tablets
1. Mit dem “MacroKey Manager” sind Sie in der Lage Ihr Media Tablet Ihren Wünschen entsprechend anzupassen. Klicken Sie hierzu doppelt auf das zugehörige Icon in der Taskleiste.
Das oben abgebildete Fenster (Abb. 3) öffnet sich. Zunächst ist der “MacroKey Manager” standardmäßig auf das “Vista”-Profil eingestellt. Sie können jedoch eines der anderen Profile auswählen
(Abb. 4) oder ein neues erstellen (Abb. 5). Für jedes Profil können Sie die Flächen “K1” - “K32” auf Ihrem Tablet individuell belegen. Mittels des in Microsoft Windows Vista integrierten Hilfswerkzeugs
“Stiftbewegungen” (Abb. 6), dessen Icon rechts unten in der Taskleiste zu finden ist, können Sie die Tasten und allgemeine Einstellungen Ihres digitalen Stiftes konfigurieren. Wenn Sie alle Einstellungen
vorgenommen haben, können Sie Ihr Media Tablet verwenden. Hierbei stehen Ihnen zwei Möglichkeiten zu Verfügung. Entweder Sie nutzen es als Maus oder als Zeichentablet.
2. Die Scrollräder an den oberen Ecken des Tablets haben die gleiche Funktion, einmal für Links- und einmal für Rechtshänder, Ist die Scroll-Taste aktiviert, scrollt man mit den beiden Rädern und die
Taste in der Mitte dient der Horizontal-/Vertikalumschaltung. Ist hingegen die Zoom-Taste aktiviert, kann man mit den Rädern ein- und auszoomen. Die Mitteltaste gibt dem Benutzer die Möglichkeit zum
sogenannten „Handwerkzeug“ zu wechseln. Sobald die Vol-Taste angewählt ist, steuert man mit dem Drehrad die Lautstärke und die Taste schaltet den Ton aus/ein (mute).
3. Mittels der beiden übrigen Tasten Wide und 4:3 kann man das Seitenverhältnis des Tablets passend zum Monitor einstellen.
1. Installation
1. Before you can use the Media Tablet you must install the supplied software. To do so, insert the CD-ROM into your CD drive and launch the file “Setup.exe”.
A window as shown above (Fig. 2) will open.
2. Click on “MacroKey Manager” and follow the on-screen instructions. After completing installation, a red tick will appear in front of the “MacroKey Manager” icon. You can likewise
install the other two programmes if you are using Microsoft Windows 2000 or XP. This is not recommended for use with Microsoft Windows Vista.
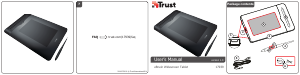
3. Afterwards the “MacroKey Manager” icon will appear in the task bar in the lower right. You can now connect the Media Tablet to your PC using a USB cable. As soon as Windows
Vista has detected the Tablet, the "Stylus movement" icon appears to the right near the “MacroKey Manager” symbol. You can now start to customise the Media Tablet.
2. Configuration and Functions of the Media Tablet
1. “MacroKey Manager” allows you to configure your Media Tablet according to your wishes. Double-click on the corresponding icon in the task bar. A window as shown above (Fig. 3) will open. At first
the “MacroKey Manager” is configured by default to the “Vista” profile. You can however select another profile (Fig. 4) or create a new profile (Fig. 5). For each profile you can individually assign
functions to the buttons “K1” - “K32” on your tablet. By means of the integrated "Stylus movement" tool in "Microsoft Windows Vista (Fig. 6) whose icon is in the lower right of the Task bar, you can
configure the buttons and general settings of your digital stylus. Once you have made all your settings you can use your Media Tablet. Here there are two possibilities available: you can either use it as
a mouse or drawing tablet.
2. The scroll wheels in the upper corner of the Tablet both have the same function: one is for left-handed people and the other for right-handed people. When the scroll button is enabled, you can scroll
with both wheels and the button in the middle serves for horizontal/vertical switching. However, when the zoom button is enabled, you can zoom in and out with the wheels. The middle button gives
the user the possibility of switching to the so-called "Hand tool". As soon as the Vol button is selected, the volume is controlled with the wheel and the button turns the sound on/off (mute).
3. Using the two remaining buttons, Wide and 4:3, you can configure the aspect ratio of the Tablet to suit the monitor.
1. Installation
1. Avant de pouvoir utiliser la Media Tablet, vous devez installer le logiciel fourni. Pour ce faire, insérez le CD-ROM dans votre lecteur CD et exécutez le fichier "Setup.exe".
La fenêtre ci-dessus (Fig. 2) s'affiche.
2. Cliquez sur "MacroKey Manager" et suivez les instructions qui s'affichent à l'écran. Une fois l'installation terminée, une coche rouge apparaît en face de l'icône "MacroKey Manager".
Vous pouvez procéder de même pour installer les deux autres programmes si vous utilisez Microsoft Windows 2000 ou XP. Leur installation n'est pas recommandée si vous utilisez
Microsoft Windows Vista.
3. L'icône "MacroKey Manager" apparaît ensuite dans l'angle inférieur droit de la barre des tâches. Vous pouvez à présent connecter la Media Tablet à votre ordinateur à l'aide d'un
câble USB. Dès que Windows Vista a détecté la tablette, l'icône de l'outil de mouvement du stylet apparaît dans l'angle inférieur droit de l'écran, à côté de l'icône "MacroKey
Manager". Vous pouvez dès maintenant personnaliser la Media Tablet.
2. Configuration et fonctions de la Media Tablet
1. "MacroKey Manager" vous permet de configurer la Media Tablet en fonction de vos besoins. Double-cliquez sur l'icône correspondante dans la barre des tâches. La fenêtre ci-dessus (Fig. 3) s'affiche.
Par défaut, "MacroKey Manager" est configuré sur le profil "Vista". Vous pouvez néanmoins sélectionner un autre profil (Fig. 4) ou en créer un nouveau (Fig. 5). Vous pouvez assigner des fonctions
spécifiques aux boutons K1 à K32 de votre tablette pour chaque profil. Grâce à l'outil de mouvement du stylet intégré dans Microsoft Windows Vista (Fig. 6) et dont l'icône apparaît dans l'angle inférieur
droit de la barre des tâches, vous pouvez configurer les boutons et les paramètres généraux de votre stylet numérique. Une fois tous les réglages nécessaires effectués, la Media Tablet est prête à
l'emploi. Vous pouvez l'utiliser de deux façons : en tant que souris ou en tant que tablette graphique.
2. Les boutons de défilement situés dans les angles supérieurs de la tablette ont la même fonction : l'un est simplement prévu pour les gauchers, et l'autre pour les droitiers. Lorsque la fonction de
défilement est activée, utilisez ces boutons pour faire défiler l'écran. Dans ce mode, le bouton du milieu permet de basculer entre le défilement vertical et horizontal. Lorsque la fonction de zoom est
activée, utilisez ces boutons pour effectuer des zooms avant et arrière. Dans ce mode, le bouton du milieu permet d'activer l'outil "Main". Lorsque la fonction de volume est activée, utilisez ces boutons
pour contrôler le niveau du volume. Dans ce mode, le bouton du milieu permet d'activer ou de désactiver le son.
3. Les deux derniers boutons ("Wide" et "4:3") permettent de configurer le format d'affichage de la tablette le mieux adapté au moniteur.
1. Installazione
1. Prima di usare la Media Tablet è necessario installare il software fornito a corredo. A questo fine, inserire il CD-ROM nell'unità CD e lanciare il file “Setup.exe”.
Si aprirà la finestra indicata sopra (Fig. 2).
2. Fare clic su “MacroKey Manager” e seguire le istruzioni fornite a schermo. Dopo il completamento dell'installazione, davanti all'icona “MacroKey Manager” verrà visualizzato un
segno di spunta rosso. Se si usa Microsoft Windows 2000 o XP, è possibile installare analogamente gli altri due programmi. Questa operazione non è consigliata per l'uso con
Microsoft Windows Vista.
3. Successivamente, l'icona “MacroKey Manager” verrà visualizzata in basso a destra nella barra delle applicazioni. A questo punto è possibile collegare la Media Tablet al PC usando
un cavo USB. Non appena Windows Vista rileva la tavoletta, l'icona "Stylus movement" viene visualizzata a destra vicino al simbolo “MacroKey Manager”. A questo punto si può
incominciare a personalizzare la Media Tablet.
2. Configurazione e funzioni della Media Tablet
1. “MacroKey Manager” permette di configurare la Media Tablet in base alle vostre esigenze. Fare doppio clic sull'icona corrispondente nella barra delle applicazioni. Si aprirà la finestra indicata sopra
(Fig. 3). Nella configurazione predefinita, “MacroKey Manager” è inizialmente configurato sul profilo “Vista”. È comunque possibile selezionare un altro profilo (Fig. 4), oppure crearne uno nuovo (Fig. 5).
Per ogni profilo si possono assegnare individualmente le funzioni ai pulsanti “K1” - “K32” sulla tavoletta. Tramite lo strumento "Stylus movement" integrato in "Microsoft Windows Vista (Fig. 6), le cui
icone si trovano in basso a destra nella Barra delle applicazioni, è possibile configurare i pulsanti e le impostazioni generali dello stilo digitale. Dopo la definizione di tutte le impostazioni è possibile
usare la Media Tablet. Ecco le due possibilità disponibili: si può usarla come mouse, oppure come tavoletta per disegnare.
2. Le rotelline di scorrimento nell'angolo superiore della tavoletta hanno entrambe la medesima funzione: una è destinata agli utenti che usano la mano sinistra, mentre l'altra è per chi usa la mano destra.
Se il pulsante di scorrimento è attivato si può scorrere con entrambe le rotelline, mentre il pulsante centrale serve per la commutazione orizzontale/verticale. Quando il pulsante zoom è attivato, è
possibile zoomare per ingrandire o rimpicciolire usando le rotelline. Il pulsante centrale offre all'utente la possibilità di passare al cosiddetto "Hand tool". Non appena si seleziona il pulsante Vol, il
volume viene controllato attraverso la rotellina e il pulsante attiva o disattiva il suono (mute).
3. Usando i due pulsanti rimanenti, Wide e 4:3, è possibile configurare il rapporto base/altezza della tavoletta per adattarlo al monitor.
IT


Participe da conversa sobre este produto
Aqui você pode compartilhar o que pensa sobre Aiptek MediaTablet 14000u Tablet gráfico. Se você tiver alguma dúvida, primeiro leia atentamente o manual. A solicitação de manual pode ser feita através do nosso formulário de contato.
responder | Isso foi útil (0) (Traduzido pelo Google)